Baked Eggplant Rolls with a Tomato Basil Sauce

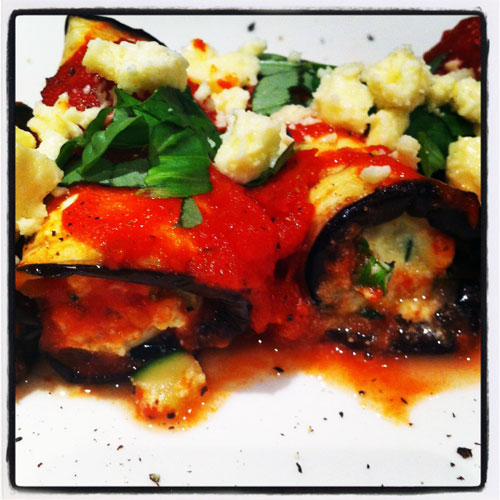
This meal was BEAUTIFUL! The sauce, the filling and everything about it was delicious.

I made this dish last week as an entree and I have to say, it was a delight to eat. I even  went back for seconds and that was after I’d consumed a slow-cooked chicken dish and a ramekin of rhubarb and apple crumble! Greedy, much?! 🙂

The dish takes a little bit of time to prepare but it really is worth it. I added a small amount of crumbled cow’s feta into the ricotta mixture and bit more on top with some basil as a garnish. Enjoy!

Egg-plant

Baked Eggplant Rolls with a Tomato Basil Sauce
Serves 4

  • 2 fresh eggplant, trimmed, sliced lengthwise into 6
  • 1 tsp olive oil
  • 3 cloves garlic, sliced
  • 800 g whole tomato canned in tomato juice, chopped
  • 2 tbs fresh basil, torn
  • 1 zucchini, finely diced
  • 150 g reduced-fat ricotta cheese
  • 1/2 cup fresh flat-leaf parsley, chopped
  • 2 tbs fresh basil, chopped
  • 3 tbs grated parmesan cheese, chopped
  • 1 small egg, lightly beaten
  • 1/2 small onion, finely chopped
  • Oil spray

Preheat oven to 230 degrees. Spray a baking tray with oil and set aside.

Lay eggplant in a single layer on prepared baking tray and spray with oil. Bake for 20 minutes, turning once or until golden brown. Remove from oven and set aside.

To make filling, spray a large non-stick frying pan with oil and place over medium-high heat. Add onion and zucchini and cook for 5 minutes, or until onion starts to soften. Add 1 clove garlic and cook for a further minute. Transfer to a small bowl and set aside to cool.

Meanwhile combine ricotta, parsley, basil and 2 tablespoons parmesan in a seperate bowl. Stir to combine. Add the cooled onion mixture to ricotta mixture, then add egg and season well with salt and pepper.

To make sauce, place the oil in a medium saucepan over medium-high heat. Add remaining garlic and saute for 2 minutes, or until light brown. Add crushed tomatoes and stir to combine then reduce heat to low. Add basil and season well with salt and pepper. Cover and simmer for 10 minutes then remove from heat and set aside.

To make eggplant rolls, reduce oven temperature to 210 degrees. Spoon 3 tablespoons of tomato sauce into the base of a 20 cm square ceramic baking dish. On a clean chopping board place a slice of eggplant. Spoon 2 tablespoons of ricotta filling at narrow end and roll up. Place in prepared baking dish, seam side down. Repeat with remaining eggplant slices.

Arrange rolls in a single layer in dish. Spoon over remaining 1/2 cup tomato sauce and sprinkle with remaining parmesan cheese. Bake for 20 minutes or until the sauce is bubbling and cheese has melted. Garnish with chopped basil and a sprinkling of feta. Enjoy.

These can be made a day ahead of time and stored in an airtight continer in the fridge. They are best reheated in a moderate oven for 15 – 20 minutes, though I didn’t have any left for the next day to reheat!

photo

Healthy Pizza with a Cauliflower Crust

A couple of weeks ago I saw a great recipe posted on Twitter. This was a healthy alternative to pizza which used cauliflower as a primary ingredient in the base.

To be quite honest, I was a little unsure about using cauliflower to make an entire pizza crust, but trust me when I say this – it is pretty amazing, and I will definitely be making it again!
111111

This recipe is easy to follow and shows pizza can be healthy, and still deliciously good. The crust already has cheese so you don’t really need much more on top.

Also pays keep in mind that the cauliflower crust isn’t quite as hearty as most regular pizza dough so you don’t want to weigh it down with a lot of ingredients.

Healthy Pizza with a Cauliflower Crust
Serves 8

For the crust:

  • 1/2 head cauliflower (about 2 cups)
  • 1 clove garlic, minced
  • 1/4 cup parmesan (an alternative can be mozzarella)
  • 1 egg, beaten
  • 1 tsp basil
  • 1 tsp oregano
  1. Pre-heat oven to 400° F. Grease and line a baking tray.
  2. Remove the stems and leaves from your cauliflower and chop the florets into chunks. Add to a food processor and pulse just until the texture is similar to rice. If you don’t have a food processor, you can grate the cauliflower with a cheese grater or chop it.
  3. Place cauliflower in an uncovered microwave-safe bowl and cook for 8 minutes. In a bowl combine the cooked cauliflower with all remaining ingredients.
  4. Spread dough out evenly over the baking paper. The pizza should be about 9-10 inches in diameter.
  5. Bake for 25-30 minutes or until the crust is golden, crispy on the edges and cooked through the middle.
  6. Remove the crust from the oven.
  7. Top with pizza sauce and toppings. You can top the pizza with whatever you like desire. Keep is simple. Be careful not to add too many heavy toppings as you don’t want to weigh down the crust.
  8. Bake the pizza for 5 minutes, or until the toppings are hot and the cheese is melted. Allow the pizza to cool for 2-3 minutes then cut and serve immediately.

Tip: I found the pizza only lasted 1-2 days in the fridge, so it is best eaten in one go!


Pumpkin, Spinach & Feta Muffins

These muffins are fantastic!

One, they are pretty versatile and two, they are often the result of the great-big-fridge-clear-out. And to honest, they also make for a damn good, healthy lunch.

Okay, so my latest addiction, the Ministry of Food Cheese Scone gives these muffins a more than decent run for their money in terms of lunch material. But give this recipe a go anyway, you will not be disappointed!

Pumpkin, Spinach & Feta Muffins
Makes 12

  • 2 cups flour
  • 4 tsp baking powder
  • 1/4 tsp salt
  • 50g butter
  • ½ cup milk
  • 1 egg, beaten
  • 2 tbsps sweet chilli sauce
  • 1 packet feta cheese, cubed
  • 2 cups pumpkin, cubed and roasted
  • 1 onion
  • 2 cups spinach

Pre-heat the oven to 180 degrees. It is best to prepare your choice of vegetables before you start, like roasting the pumpkin cubes and chopping the onion and mushrooms – set aside in a bowl.

Mix together flour, baking powder, salt and feta. Add vegetables to dry ingredients. Melt butter and combine with milk, egg and sweet chilli sauce. Add to dry ingredients. Mix to combine, but remember to not over mix. Spoon the mixture into a greased muffin tray.

Bake at 180 degrees for at least 15 minutes. Cool in pan on a rack five minutes, then transfer muffins from pan to rack and cool to warm or room temperature.

Mum’s Cheese Ball

It’s been a while, but I’m back. Sometimes life just gets in the way of blogging. Especially food blogging!

If you were to think of one food that your family absolutely loves and devours almost the instant it hits the table – what would it be? For me, it’d be this dish. A simple but sophisticated bowl of cheese ball.

How long has this recipe been around? God only knows. There is no arguing this recipe is decades old. It is from my Mum’s collection of dishes she usually makes for a dinner guests, probably more so in the nineties. It is the ultimate crowd pleaser recipe. The recipe I remember, as a child, dinner guests not leaving without.

It is rather an odd mix of ingredients that make it what it is. Unlike traditional cheese ball recipes, this one doesn’t end up in a ball, rolled in sesame seeds or nuts. I personally think this makes it even easier to eat and tastes great with crackers, crostini or carrot sticks.

Mum’s Cheese Ball

  • 250 grams cream cheese
  • 1 cup cheese, grated
  • 2-3 gherkins
  • 2 tbsps tomato sauce
  • 1 onion
  • 1/4 cup parsley (optional)
  • 1/4 cup sesame seeds or chopped walnuts

In a food processor, mix together the gherkins and the onion and blend until very small. Add the cream cheese, cheese, and tomato sauce. Add some parsley if you wish. Pour mixture into a bowl and sprinkle some sesame seeds or chopped nuts over the top. Cover with gladwrap and refrigerate until required. I find if this dish is left overnight the flavours really develop! Enjoy.

Old-Fashioned Sausage Rolls

Sausage rolls – they’re usually a little touch n’ go, aren’t they.

It is fairly rare that I’d go to a cafe to eat a sausage roll these days, but while I’m here I might as well give a little shout out to one of the quaintest little cafes in the Hawkes Bay. That cafe is The Paper Mulberry and you should definitely go there if you are passing through and in need of a cuppa. These guys make great sausage rolls, and fabulous coffee! Either way, you’ll find it well worth slowing down and pulling in.

But if you’re not up that way, check out this recipe.  Although this is only my second ever homemade sausage roll experience, they taste pretty good! Much better than the very first time I attempted a sausage roll which were the days of Home Economics at intermediate school, I was 11. This recipe is based on one I found in The Healthy Food Guide magazine and includes a vegetable or two so probably a bit healthier than your average sausage roll!

They make a great snack, lunch or party food and you can decide how big or small you want them to be. I do have one tip though: make sure you have heaps of tomato sauce or nice chutney to go with them. They really are quite delicious straight out of the oven! Next time though, I think I will experiment with the flavours a bit more. I just discovered a recipe that uses caramelised onions and blue cheese! Amen to that, so watch this space!

Old-Fashioned Sausage Rolls

  • 3 sheets ready-rolled reduced-fat puff pastry
  • 500 grams trim pork mince
  • 2 slices wholemeal bread, made into crumbs
  • 1 medium onion, chopped
  • 1 medium kumara, grated
  • 2 courgette, grated
  • 1 tbsp bran
  • 2 tsp dried sage
  • 2 tsp mixed herbs
  • 1/2 teaspoon salt
  • 1 tsp Worcestershire sauce
  • 2 tablespoons tomato sauce, be generous
  • water, to seal pastry
  • 1/4 cup trim milk, for glazing

Preheat the oven to 220 degrees. In a bowl, combine the fresh breadcrumbs, herbs, salt, bran flakes, onion, meat, grated kumara, grated courgettes and the sauces. If you have a processor, chop the onion, add the slices of bread and pulse to crumbs, then add all the rest of the ingredients and mix in the processor.

Lay out the pastry on a floured bench. Scoop out the meat mixture and place a ‘sausage’ of mixture along the middle of each strip. Brush one edge of the strip with water, roll the pastry over and seal it together to form a long roll.

Cut into approximately eight sausage rolls depending on how big you’d like them. Place the rolls seam side down on a greased tray. Slash the top of each sausage roll once or twice with a serrated knife to allow steam to escape, then brush each one lightly with milk. You could then sprinkle with a few sesame seeds or poppy seeds or perhaps, sprinkle with a small amount of grated cheese. Clearly I forgot this step! 😦

Bake in the preheated oven for 20-25 minutes, or until dark golden. Serve with tomato sauce or a nice chutney for dipping.

Spinach and Feta Tartlets

I actually can’t recall when I first saw this recipe. No doubt in some women’s magazine I picked up briefly at the supermarket or in a waiting room. I truly believe one of the best fillings for pretty much *anything* is the spinach and feta combo. Spanakopita, quiche, tarts, omelettes, bread…you just can’t beat it. In fact, I’m pretty sure any time I cook with either it is always a success.

This recipe is a gorgeous combination of spinach and feta cheese in a nice pie crust. I could seriously eat one of these almost every day, well I wish! The filling is so quick and easy to throw together, too.…what’s not to love?

Go on…enjoy this lunchtime delight.

Spinach and Feta Tartlets
Serves 12 

  • 200 grams baby spinach leaves, chopped
  • 200 grams creamy feta
  • 200 grams puff pastry
  • 2 medium-sized eggs
  • 1 tsp ground nutmeg
  • Salt and pepper
  • 100 grams sun-dried tomatoes, chopped

Turn the oven on to 180 degrees. Spray a 12-hole muffin tin. Roll out pastry into a large rectangle and using a pizza cutter, slice into approximately 8 x 8 cm squares. Next carefully mould each piece into the muffin pan.

Pop the spinach, feta, sun-dried tomatoes, nutmeg and eggs into a bowl and combine. Add salt and pepper to taste. Spoon mixture evenly amongst the pastry cases. Place into the oven to bake for approximately 20-25 minutes.

Put one of these into the lunchbox along with a side salad!

Beef and Vegetable Pie

I came across a food magazine the other night at the supermarket that I hadn’t seen before. It is published here in New Zealand and is called Recipes+. The April issue contains at least 300 recipes which are no-fuss and extremely budget friendly.

Every recipe in the magazine is easy, and delicious! I was particularly impressed to see it also had plenty of recipes that were gluten-free and vegetarian. Best of all, it contained an excellent index! There isn’t anything worse than seeing a recipe and having to flick through to find it again a couple of months later!

I have a few meals that I am going to try this week. So if you’re looking for a delicious, filling weeknight meal which is inexpensive and low in fat, look no further.

Beef and Vegetable Pie

  • 500 grams beef mince
  • 1 brown onion, chopped
  • 500 grams vegetables, chopped (I used broccoli, carrots, potato, and zucchini)
  • 1/3 cup brown onion gravy powder
  • 1 sheet frozen puff pastry, thawed

Preheat oven to 200 degrees. Grease a 20 cm square ovenproof dish. Heat oil in in a saucepan over a high heat. Add mince and onion. Cook stirring to break up any lumps in the mince, for 5 minutes or until browned.

Add chopped vegetables, gravy powder and a 1/2 cup of water. Cook and stir for approximately 3 minutes or until the sauce is nice and thick!

Transfer mince mixture to prepared dish. Place a pastry sheet over the mince mixture to cover. Roll the overhanging pastry inwards to form a border around the edge of the dish. Score the top of the pastry with a small sharp knife. Brush with extra milk.

Bake for 12-15 minutes or until browned.

This pie is perfect to eat around this time of the year when the nights are cooler and all you want is a nice, hot meal when you get home. On a sweet note, the April issue also includes a picture of a pretty amazing looking White Chocolate Mud Cake – something else I might have to try! Drool.

Thai Red Chicken Curry

Thai food is a winner at any dinnertime. The unusual flavour combinations make this style of food a great variation for families tired of the standard ‘meat and three vege’ dishes that grace so many New Zealand dinner tables!

I’ve been making my Mum’s Thai red curry for several years now so I’ve pretty much got it down pat. Over the years, I’ve tweaked my recipe to make it even tastier. I think I’ve finally hit upon the right combination of ingredients that makes it as good as the red curry that you can get in any Thai restaurant.

This recipe uses very few ingredients so is not complicated at all. I find it is such a great meal to put in the freezer for those weeknights when you get home and you’re a little tired, hungry, irritable, cold…….yes, you get the picture!

Although I tend to use chicken, pork and beef would work just as well. Regardless of the meat choice and side ingredients used, red curry is just so satisfying!

Thai Red Chicken Curry

  • 45 grams butter
  • 1 onion
  • 1/2 tsp garlic, chopped finely
  • 1 red pepper
  • 3 tsp red curry paste
  • 1 tsp cumin
  • 2 Tbsp flour
  • 2 cups chicken stock
  • 500 grams lean chicken breasts, chopped

Melt the butter slowly in a heated fry pan. Cook the onion, garlic and red pepper. Add the curry paste, cumin and flour. Stir in the chicken stock and simmer until the mixture boils. Add chicken and simmer for approximately 3 minutes so the chicken is heated through.

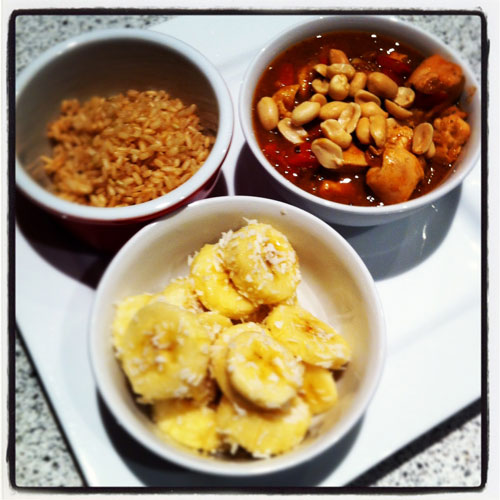
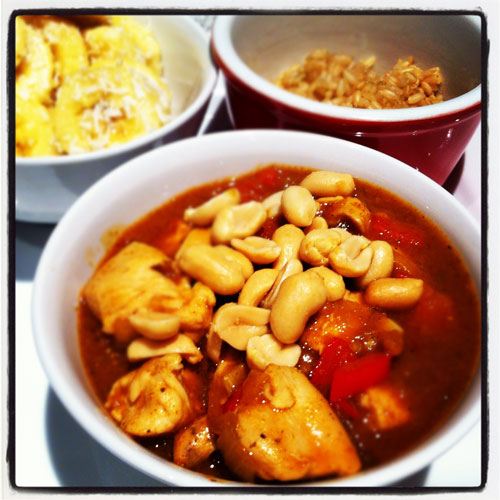
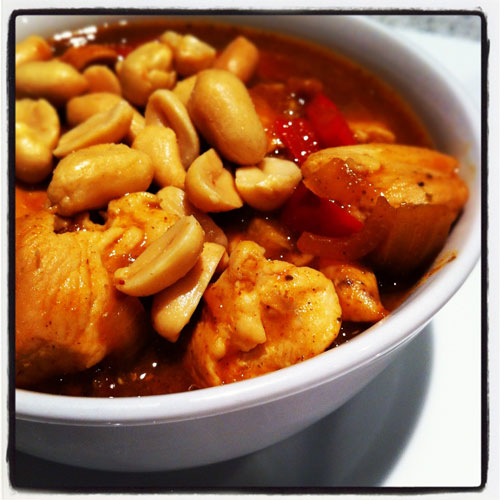
Take off heat and service with boiled rice. I’m not sure if this is a traditional thing or just something my Mum read/saw in a magazine but like her, I serve mine with a serving of sliced banana mixed roughly with one tablespoon of coconut. This tends to ease the spiciness that comes through from the paste. Sprinkle a small handful of peanuts over the plated curry and voila!

Bacon and Egg Pie

Most New Zealander’s I know love a slice of bacon and egg pie. I wouldn’t call this so much a recipe as I would an assemblage. There is nothing too challenging about making a bacon and egg pie and you probably won’t ever need this recipe. It does however hold a strong place in my heart so to me, belongs on my blog.

This recipe makes for a really quick and easy lunch or light meal. Combined with a nice salad, you have your self a pretty delicious meal.  My Mum would actually be horrified I am even sharing this recipe because it is literally make and bake.

I used the very easy store-bought puff pastry (Mum would also be horrified at this) but the flaky pastry recipe in the Edmonds Cookery book is pretty easy so if you have a bit of time..

I don’t really have too much more to say about this! Enjoy.

Bacon and Egg Pie

  • 400 gram packet of store-bought flaky puff pastry
  • 200 gram packet of shoulder bacon
  • 5 medium-sized eggs
  • Salt and pepper

Roll out half the puff pastry on a floured board until you have yourself a lovely rectangle. Lift off the board and shape into a sprayed oven dish. Line the dish with strips of the bacon so the pastry is evenly covered. Crack 5 eggs over the bacon and break up the yolks with a knife. Roll out the second half of the puff pastry and lay over the pie.

Bake at 180 degrees for approximately 45 minutes.

Feta and Paprika Cheese Straws

It is fair to say, I love a good dip. Cheese ball, hummus, salsa, pesto, or just the well-known kiwi onion dip. Yip, dip rocks! Needless to say I’m often on the lookout for things to dip in dip.

From memory, they were big in New Zealand in the seventies, being cheap and relatively easy to make. I came across this recipe in the one of the midweek papers a couple of weeks ago. To be honest, at the time, I was more caught drooling over the plum sauce recipe than the straws but since I am very much plum-less…I had to make do.

A word of warning – these are very addictive! Pair them with some homemade plum sauce and you’ll have yourself a rather attractive looking snack! They’re best eaten warm from the oven, but if you need to make them ahead, leave them to crisp up in a cool oven before removing to an air-tight container – they’re less likely to soften.

Feta and Paprika Cheese Straws

  • 1 cup self raising flour
  • 1 teaspoon dried mustard
  • 1 teaspoon paprika
  • 60 grams butter, diced
  • 1/2 a cup grated cheese
  • 1/2 a cup feta cheese, crumbled

To make the cheese straws, preheat your oven to approx 190 degrees. Grease an oven tray. Sift the flour and paprika into a bowl. Rub in the butter with your fingertips until the mixture resembles breadcrumbs. I found I had to add a little more water to the mix at this stage as it seemed a little dry! Stir in both the grated cheese and the crumbled feta cheese.

Next, lightly beat the egg and add to the mixture. Stir until a dough is formed and then roll out on a floured surface. You want to make sure the dough is roughly 5mm thick before slicing into strips. I  found a pizza cutter (if you have one!) was ideal for this part.

Transfer the strips onto a cooked tray lined with paper. Lightly brush with a bit of milk and sprinkle with sesame seeds or poppy seeds. Bake for around 10 to 12 minutes or until golden. Cool on a wire rack and store in an air tight container.

This recipe makes approximately 16 straws.