Broccoli, Kumara and Blue Cheese Soup

Well, hello there! It’s winter and it’s cold and all I really feel like eating is soup. Tonight I whipped up a broccoli, kumara and blue cheese soup for dinner, and it’s delish! You can too…

Broccoli, Kumara and Blue Cheese Soup
Serves 4

  • 4 small kumara
  • 1tbsp oil
  • salt and cracked pepper
  • chilli powder
  • 1 head broccoli
  • 2 tbsp crumbled blue cheese

Heat oven to 190 degrees and cut kumara into chunks. Spread in a roasting dish, add oil, salt and pepper and chilli powder. Roast for 20-25 minutes until golden.

Cut broccoli in small bits. Fill a medium-sized saucepan with water and bring to the boil. Add a generous pinch of salt, then add broccoli. Boil for four minutes.

Using a slotted spoon, remove broccoli from water and place in a blender or food processor. Add about three cups of the salted water from the saucepan. Add kumara and blue cheese. Blend very well, at least two minutes, until smooth. Taste, and season.

Enjoy!

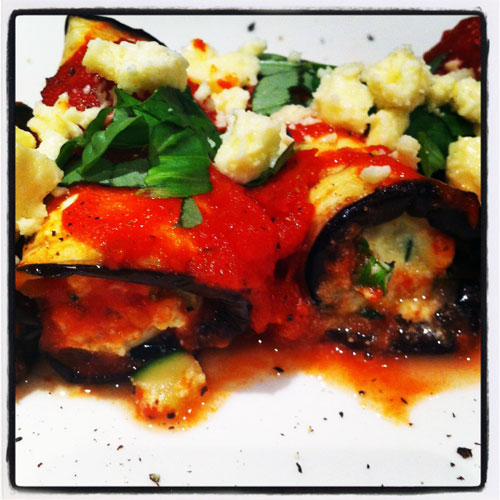
Baked Eggplant Rolls with a Tomato Basil Sauce

This meal was BEAUTIFUL! The sauce, the filling and everything about it was delicious.

I made this dish last week as an entree and I have to say, it was a delight to eat. I even  went back for seconds and that was after I’d consumed a slow-cooked chicken dish and a ramekin of rhubarb and apple crumble! Greedy, much?! 🙂

The dish takes a little bit of time to prepare but it really is worth it. I added a small amount of crumbled cow’s feta into the ricotta mixture and bit more on top with some basil as a garnish. Enjoy!

Egg-plant

Baked Eggplant Rolls with a Tomato Basil Sauce
Serves 4

  • 2 fresh eggplant, trimmed, sliced lengthwise into 6
  • 1 tsp olive oil
  • 3 cloves garlic, sliced
  • 800 g whole tomato canned in tomato juice, chopped
  • 2 tbs fresh basil, torn
  • 1 zucchini, finely diced
  • 150 g reduced-fat ricotta cheese
  • 1/2 cup fresh flat-leaf parsley, chopped
  • 2 tbs fresh basil, chopped
  • 3 tbs grated parmesan cheese, chopped
  • 1 small egg, lightly beaten
  • 1/2 small onion, finely chopped
  • Oil spray

Preheat oven to 230 degrees. Spray a baking tray with oil and set aside.

Lay eggplant in a single layer on prepared baking tray and spray with oil. Bake for 20 minutes, turning once or until golden brown. Remove from oven and set aside.

To make filling, spray a large non-stick frying pan with oil and place over medium-high heat. Add onion and zucchini and cook for 5 minutes, or until onion starts to soften. Add 1 clove garlic and cook for a further minute. Transfer to a small bowl and set aside to cool.

Meanwhile combine ricotta, parsley, basil and 2 tablespoons parmesan in a seperate bowl. Stir to combine. Add the cooled onion mixture to ricotta mixture, then add egg and season well with salt and pepper.

To make sauce, place the oil in a medium saucepan over medium-high heat. Add remaining garlic and saute for 2 minutes, or until light brown. Add crushed tomatoes and stir to combine then reduce heat to low. Add basil and season well with salt and pepper. Cover and simmer for 10 minutes then remove from heat and set aside.

To make eggplant rolls, reduce oven temperature to 210 degrees. Spoon 3 tablespoons of tomato sauce into the base of a 20 cm square ceramic baking dish. On a clean chopping board place a slice of eggplant. Spoon 2 tablespoons of ricotta filling at narrow end and roll up. Place in prepared baking dish, seam side down. Repeat with remaining eggplant slices.

Arrange rolls in a single layer in dish. Spoon over remaining 1/2 cup tomato sauce and sprinkle with remaining parmesan cheese. Bake for 20 minutes or until the sauce is bubbling and cheese has melted. Garnish with chopped basil and a sprinkling of feta. Enjoy.

These can be made a day ahead of time and stored in an airtight continer in the fridge. They are best reheated in a moderate oven for 15 – 20 minutes, though I didn’t have any left for the next day to reheat!
photo

Spinach and Feta Tartlets

I actually can’t recall when I first saw this recipe. No doubt in some women’s magazine I picked up briefly at the supermarket or in a waiting room. I truly believe one of the best fillings for pretty much *anything* is the spinach and feta combo. Spanakopita, quiche, tarts, omelettes, bread…you just can’t beat it. In fact, I’m pretty sure any time I cook with either it is always a success.

This recipe is a gorgeous combination of spinach and feta cheese in a nice pie crust. I could seriously eat one of these almost every day, well I wish! The filling is so quick and easy to throw together, too.…what’s not to love?

Go on…enjoy this lunchtime delight.

Spinach and Feta Tartlets
Serves 12 

  • 200 grams baby spinach leaves, chopped
  • 200 grams creamy feta
  • 200 grams puff pastry
  • 2 medium-sized eggs
  • 1 tsp ground nutmeg
  • Salt and pepper
  • 100 grams sun-dried tomatoes, chopped

Turn the oven on to 180 degrees. Spray a 12-hole muffin tin. Roll out pastry into a large rectangle and using a pizza cutter, slice into approximately 8 x 8 cm squares. Next carefully mould each piece into the muffin pan.

Pop the spinach, feta, sun-dried tomatoes, nutmeg and eggs into a bowl and combine. Add salt and pepper to taste. Spoon mixture evenly amongst the pastry cases. Place into the oven to bake for approximately 20-25 minutes.

Put one of these into the lunchbox along with a side salad!

Homemade Hamburgers

Every now and then I go over to the Healthy Food Guide and grab a recipe for dinner. They have hundred of recipes that are healthy, low-cost (using few ingredients) and easy!

As a kiwi, I enjoy an outdoor barbecue every now and then! And like most, I also enjoy creating a homemade hamburger! Seems awfully simple and not entire worthy of a blog post, but helpful none the less.

Homemade Hamburgers
Serves 6

  • 500 grams beef mince
  • 1 carrot, grated
  • 1 onion, finely chopped
  • 1 teaspoon garlic or onion salt (I used regular cooking salt)
  • 1/2 cup rolled oats

Place the beef mince, carrot, onion, salt and rolled oats into a bowl. Mix with clean hands and divide into 6 lots. Press each lot into a saucer to make a patty, or shape patty with your hands. At this stage place all 6 patties on a plate and pre-cook in the microwave for around 5 minutes. This really speeds up the cooking process!

Now if you’ve got yourself a beautiful sunny evening, you can use the BBQ to cook these. I didn’t so I sprayed a frying pan. Put patties in and fry, turning, until cooked. Remember to turn down the heat if you find they are cooking too fast.

Split buns in half. Grill until golden. Spread with tomato sauce. To put hamburgers together, place cooked meat patty on top of sauce, then tomato slices on top, then lettuce and other salad ingredients of your choice! Put lid on top and serve. Yummy.

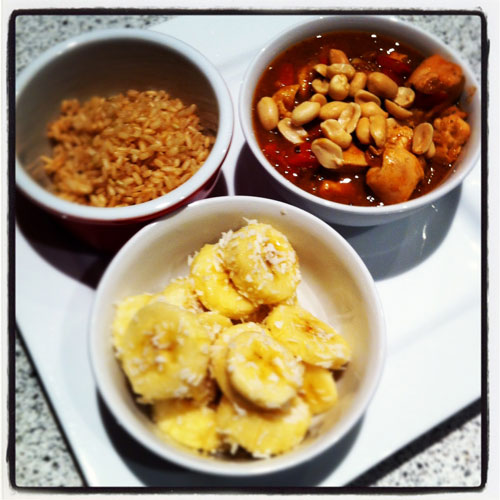
Thai Red Chicken Curry

Thai food is a winner at any dinnertime. The unusual flavour combinations make this style of food a great variation for families tired of the standard ‘meat and three vege’ dishes that grace so many New Zealand dinner tables!

I’ve been making my Mum’s Thai red curry for several years now so I’ve pretty much got it down pat. Over the years, I’ve tweaked my recipe to make it even tastier. I think I’ve finally hit upon the right combination of ingredients that makes it as good as the red curry that you can get in any Thai restaurant.

This recipe uses very few ingredients so is not complicated at all. I find it is such a great meal to put in the freezer for those weeknights when you get home and you’re a little tired, hungry, irritable, cold…….yes, you get the picture!

Although I tend to use chicken, pork and beef would work just as well. Regardless of the meat choice and side ingredients used, red curry is just so satisfying!

Thai Red Chicken Curry

  • 45 grams butter
  • 1 onion
  • 1/2 tsp garlic, chopped finely
  • 1 red pepper
  • 3 tsp red curry paste
  • 1 tsp cumin
  • 2 Tbsp flour
  • 2 cups chicken stock
  • 500 grams lean chicken breasts, chopped

Melt the butter slowly in a heated fry pan. Cook the onion, garlic and red pepper. Add the curry paste, cumin and flour. Stir in the chicken stock and simmer until the mixture boils. Add chicken and simmer for approximately 3 minutes so the chicken is heated through.

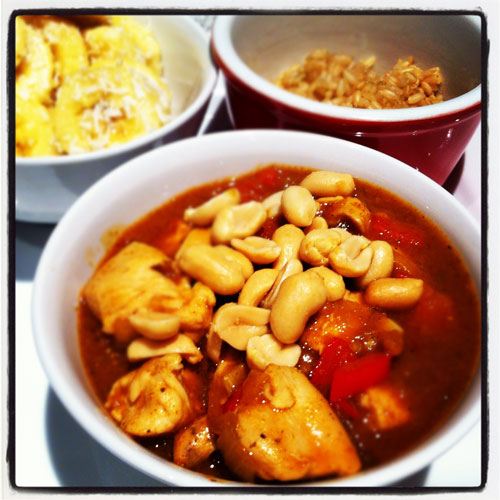
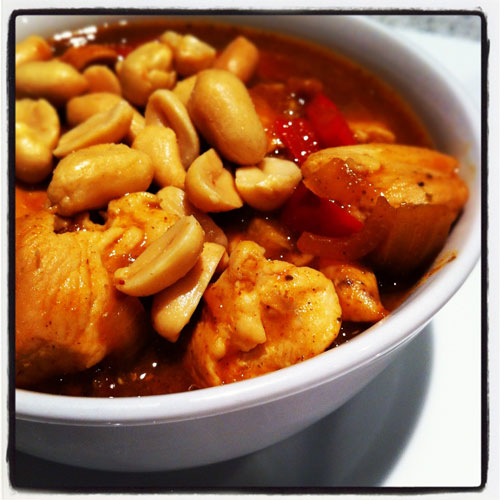
Take off heat and service with boiled rice. I’m not sure if this is a traditional thing or just something my Mum read/saw in a magazine but like her, I serve mine with a serving of sliced banana mixed roughly with one tablespoon of coconut. This tends to ease the spiciness that comes through from the paste. Sprinkle a small handful of peanuts over the plated curry and voila!

Bacon and Egg Pie

Most New Zealander’s I know love a slice of bacon and egg pie. I wouldn’t call this so much a recipe as I would an assemblage. There is nothing too challenging about making a bacon and egg pie and you probably won’t ever need this recipe. It does however hold a strong place in my heart so to me, belongs on my blog.

This recipe makes for a really quick and easy lunch or light meal. Combined with a nice salad, you have your self a pretty delicious meal.  My Mum would actually be horrified I am even sharing this recipe because it is literally make and bake.

I used the very easy store-bought puff pastry (Mum would also be horrified at this) but the flaky pastry recipe in the Edmonds Cookery book is pretty easy so if you have a bit of time..

I don’t really have too much more to say about this! Enjoy.

Bacon and Egg Pie

  • 400 gram packet of store-bought flaky puff pastry
  • 200 gram packet of shoulder bacon
  • 5 medium-sized eggs
  • Salt and pepper

Roll out half the puff pastry on a floured board until you have yourself a lovely rectangle. Lift off the board and shape into a sprayed oven dish. Line the dish with strips of the bacon so the pastry is evenly covered. Crack 5 eggs over the bacon and break up the yolks with a knife. Roll out the second half of the puff pastry and lay over the pie.

Bake at 180 degrees for approximately 45 minutes.

Do you like Frittata?

If you do, try this easy Spinach and Leek Baked Frittata.

A frittata is mostly like an omelette except without the fuss of that folding over thingee that you do with omelets. The thingee that in 25 years….I haven’t quite mastered…which is kind of why I prefer frittata. I guess a frittata is almost a cross between a quiche (a family staple I grew up on!) and an omelette. You sort of get the best of both worlds, except healthier. Bonus.

It’s flat and usually thicker than an omelette, with a lot more stuff in it. Making a frittata is a good way to use up those odds and ends of vegetables and cheese that might otherwise get thrown away. Spinach? Leek? Courgette? Mushrooms? Feta? You name it..a frittata can be whatever you want it to be!

I’ve always been a big fan of eggs in all their forms, scrambled, boiled (with soldiers of course) and especially poached. In fact I make an egg-related dish pretty much once a week. It is such a fast weeknight meal and you can usually make it with ingredients that you already have in the fridge! Total money saver right there.

The following recipe is very basic but totally reliable. It is wonderfully delicious AND super simple. Double win.

Spinach and Leek Baked Frittata

You can serve this frittata warm or cold with roasted tomatoes or a leafy salad. It’s also a great finger food, cut into small squares.

  • 250 grams baby spinach leaves
  • 1 whole leek, thinly sliced
  • 6 eggs, lightly beaten
  • 2 teaspoons cornflour
  • 100 ml skim milk
  • 2 tablespoons grated parmesan cheese

Preheat oven to 180°C. Spray a 20cm square non-stick cake tin with oil. Line base with baking paper. Cook spinach in boiling water for 30 seconds, or until just wilted. Drain and squeeze out any excess water. Allow to cool, then roughly chop.

Cook leek for 3 minutes in same cooking water. Drain and allow to dry. Scatter spinach and leek into bottom of tin.

Beat eggs with cornflour and milk. Season well with salt and pepper. Pour this mixture over vegetables, pressing down with back of a fork. Scatter over cheese and bake for 20 minutes, or until risen and golden brown.

Remove from oven and allow to cool for 10 minutes, then turn out. Serve warm, cut into wedges with a green salad. Any leftovers can be stored in an airtight container in the fridge for 1-2 days.

Pumpkin, Spinach and Sun-Dried Tomato Risotto

I have a few recipes for Risotto hidden away in various cookbooks. They all look incredibly delicious but unfortunately I don’t always have that much time to rustle up an evening meal.

This recipe is fairly nutritious and one of those really easy-to-make meals.

Pumpkin, Spinach and Sun-Dried Tomato Risotto

  • 4 to 5 cups of quality chicken stock
  • olive oil
  • 1 onion, finely diced
  • 3 cloves of garlic, chopped
  • 1¼ cups of risotto rice
  • 400 grams of pumpkin, peeled and cut into 1 cm cubes
  • ½ cup of fresh parmesan cheese, grated
  • salt and freshly ground black pepper
  • ¼ cup of fresh sage leaves
  • 4 cups of baby spinach
  • 1 cup of sun-dried tomatoes, sliced
  • Shaved parmesan to garnish
Place stock in a small saucepan and bring to the boil, then turn down the heat to simmer. Heat 2 tablespoons oil in a large heavy-based pan, add the onion and garlic, then cook over a medium heat for 5 minutes until soft. Add risotto rice and pumpkin and cook for 2 minutes, stirring continuously.
Add a cup of hot stock to the pan and stir until the stock is absorbed. Repeat, adding cupfuls of stock until it is all absorbed and the rice is tender to the bite or al dente (this takes 15 to 20 minutes). Remove the pan from the heat and stir in the parmesan, baby spinach and sun-dried tomatoes. Season with salt and pepper to taste. Fry the sage leaves in a hot pan with a little oil for 30 seconds or until crisp. Serve risotto topped with crisp sage leaves.

Spanakopita (Greek Spinach and Cheese Pie)

I love Greek food. Maybe it’s just because I have a not-so-secret love affair with feta and spinach combos!

The weekend called for spanakopita (a Greek dish which literally translates to ‘spinach pie’). Kiallas, my local café in Newtown, sell out of these puppies as quickly as they can make them. They are the most popular items on the menu – they really are that good and have the richest, creamiest, feta EVER… utter heaven. Sunday was one of those days (sadly!), but I’d been dying to try spanakopita at home and what a perfect excuse!

This recipe was recommended by a friend and comes from Jamie Oliver. The filling is extra creamy and luscious but best of all, the process for making spanakopita is really simple and only takes 20 minutes in the oven making it a healthy (ish!), vegetarian meal perfect for a weeknight dinner.

Yes, this recipe is incredibly delicious. I cannot wait to visit Greece one day and have a spanakopita, or the lesser known, but perhaps more traditional Tiropita (no spinach). Enjoy this one!

Spanakopita (Greek Spinach and Cheese Pie)

  • 100 grams of pinenuts
  • 5 eggs
  • 300 grams of feta cheese
  • 50 grams Cheddar cheese
  • Dried oregano
  • 1 lemon
  • A knob of butter
  • 400 grams of prewashed baby spinach
  • 1 x 270 gram pack of filo pastry
  • Cayenne pepper
  • 1 whole nutmeg
Turn on the oven to 200 degrees. Put a medium frying pan on a medium heat. Put the pinenuts into the dry ovenproof frying pan to toast, tossing occasionally. Keep an eye on them as they tend to burn veeery easily!
Crack 5 eggs into a mixing bowl and crumble in 300 grams of feta. Grate in the cheese. Add a pinch of pepper, a couple of pinches of dried oregano, zest of 1 lemon and a glug of olive oil. Once the nuts are light golden, add them to the egg mixture and mix well.

Put the empty frying pan back on the heat, add a little olive oil and a knob of butter and pile in half of the spinach. Gently push and move it around and add more as it wilts down. Make sure it doesn’t catch on the bottom and, when there’s room, start adding the rest, stirring frequently.

Lay a large sheet of greaseproof paper, approx 50cm long, on the worktop, rub a little olive oil all over it, then scrunch it up and lay it out flat again. Arrange 4 filo pastry sheets in a large rectangle, overlapping at the edges, so they almost cover the paper. Rub some olive oil over them. Sprinkle over a good pinch of salt and pepper and a pinch of cayenne. Repeat until you have 3 layers. Don’t worry about any cracked bits.

Once the spinach is really nice and dense, take the pan off the heat. Add the wilted spinach to the egg mixture and grate in ½ a nutmeg. Mix well. Carefully move the greaseproof paper and filo into a glass oven proof dish so the edges spill over. Push it down into the sides, then pour in the egg mixture and spread it out. Fold the filo sheets over the top.

Place the spanakopita into the hot oven for about 18 to 20 minutes, or until golden and crisp. Eat while hot with a delicious green salad! Bon appetit!

Mini Quiches

Quiche. It can be eaten at any time during the day. Breakfast? Yum! Lunch? Great! Dinner? Delicious! A quiche is a bit like a good club sandwich – an oldie but a goodie and quite a kiwi one at that!

One night this week, dinner consisted of mini quiches in homemade pastry shells with mushrooms, diced onions, bacon, sun dried tomatoes and a sprinkling of cheese. To lighten the meal up a bit I served it with a green salad.

Quiche is one of my favourite things to make and these are so adorable and much more fun than a regular old quiche! As a child I remember going to great Aunt’s house in Eastbourne, Wellington. She had set up a little tea party for my two older sisters and me. We each had our own individual teacup, saucer and teapot (with hot blackcurrant!). I remember walking away thinking that was just the bee’s knees. It could have been partly to do with having two siblings and having to share everything..yeah, I was no good at that but that summer afternoon made so much sense, everything was all right with my 7 year old world.

To cut the long story short, since then I’ve always liked meals that are presented as individual portions (these days it is never a sharing issue, more aesthetically pleasing presentation!). Anything in ramekins like mini pot pies – fish or chicken and leek I just love. MMMmmm.

These little gems are just so damn tasty but you can decide for yourself. The idea is to be creative and play with ingredients! I used a 12-hole muffin pan for this basic quiche recipe. I cut out square pieces of pastry and just kind of free formed the crust. I love making a quiche and it is such a great staple for the ultimate kiwi summertime picnic. Amen.

Mini Quiches

For the pastry crust:

  • 1 cup of flour
  • 1/2 a teaspoon of salt
  • 50 grams of butter, softened
  • 1/2 a cup of grated cheese
  • 3-4 tablespoons of water
Sift the flour and salt together. Cut in the butter until the mixture resembles coarse breadcrumbs. Add the grated cheese and then the water, a few drops at a time until the dough sticks together and forms a soft ball. You may need to add a small amount of flour if the mixture appears a little too wet. Chill the dough for five minutes. Roll dough out onto a floured board and slice into 10 x 10 cm squares. Place each square until a muffin hole and shape to fit.
For the filling:
  • 3 eggs
  • 1/2 a cup of trim milk
  • 2 tablespoons of flour
  • 1/2 a teaspoon of salt
  • 1/2 a teaspoon of pepper
  • 1/2 a cup of grated cheese (or chopped feta)
  • 1 medium onion
  • 2 rashers of bacon
  • chopped sun dried tomatoes
  • sliced mushrooms
Beat the eggs, milk, flour, salt and pepper together. Fill the small pastry cases with anything you’d like in your quiches. I used all ingredients listed above. If using bacon, give it a quick zap in the microwave first and then chop up and divide between the muffin holes. Top with cheese and pour the egg mixture between each muffin hole. Shake a wee bit of pepper and salt over the top of each. I also topped the quiches with a few pine nuts to add to the flavour!
Bake at 200 degrees for about 20 minutes. Enjoy!