After Taste presents Sweet New Zealand…….

After Taste is hosting Sweet New Zealand again this month, so get your entries ready!

posterf32576529a806eb339924191f5557132f28d6fa9

This event was originally started by Alessandra Zecchini in 2011 and really encourages food bloggers to share their secret recipes, discover new delights and of course, get to know other New Zealand food bloggers, living both here and overseas. Here are some super simple rules:

  1. This event is open to all bloggers living in New Zealand (even if you are not a Kiwi), as well as all Kiwi bloggers living and blogging overseas.
  2. You can enter anything sweet (as simple or complicated as you like): cakes, biscuits, slices, desserts, even drinks, and you may submit as many entries as you like, including old posts if you like.
  3. Your entry must contain the following: the phrase “Sweet New Zealand”, a link to the host (my blog homepage), a link to this post and include the Sweet New Zealand badge (just right-click and download the image from this post), and if you are submitting an older post remember to update it accordingly with all of the above.
  4. To submit your entry email me at aftertasteblog@gmail.com by 30th May with:

– your name
– your blog name
– a link to your blog
– a link to the post you’re contributing (and name of recipe)
– a photo from your post (not more than 250 kb if possible)

I’ll do a round up of all entries at the end of May. I am really looking forward to seeing all the entries 🙂

After Taste

Coconut Whispers

A month or so ago I bought what has become one of my all-time favourite recipe books, Ladies, a Plate. This book, written by New Zealand author Alexa Johnston, is jam-packed full of traditional home baking. It gives a fantastic insight into New Zealand baking classics (some of which I did not know) over the years.

Alexa’s interest in old-fashioned recipes began with her mothers copies of the New Zealand Women’s Institutes Home Cookery Book and the League of Mothers Cookery Book, as well as a number of church fundraising cookbooks. She also collects a large number of community recipe books.

The thing I love most is that each recipe comes with a tale, along with a wonderful full-page photograph. At the back of the book is a list of all the places these recipes were sourced from and I’d love to get a hold of some of the originals. Some of the cookbook titles just make you smile..

These biscuits are small and simple. They don’t require expensive ingredients and they don’t take long to make. They are extremely easy, light, and moorish. You can use dessicated coconut, as stated in the recipe, but the only coconut I had on hand was coconut thread and it worked just as well. This is coming from someone who loves the texture of cocunut, so perhaps stick with the dessicated stuff if you’re not so keen.

Her book is full of words of wisdom and helpful hints for successful home baking. Alexa also states and I have to agree:

A cup of tea without a biscuit is a missed opportunity.

On that note…

01111

Coconut Whispers

  • 55 grams butter, softened
  • 115 grams white sugar
  • 1 egg
  • ½ tsp vanilla
  • 150 grams dessicated coconut

Cream the butter and sugar using an electric mixer. Mix in the egg and the vanilla. Using a spoon, stir through the coconut.

Place teaspoonfuls of dough onto trays lined with baking paper, leaving space for spreading, and flatten slightly with a wet fork. Bake in a pre-heated 160 degree oven for 25 minutes or until golden, and cool the biscuits on the paper on a wire rack.

Enjoy!

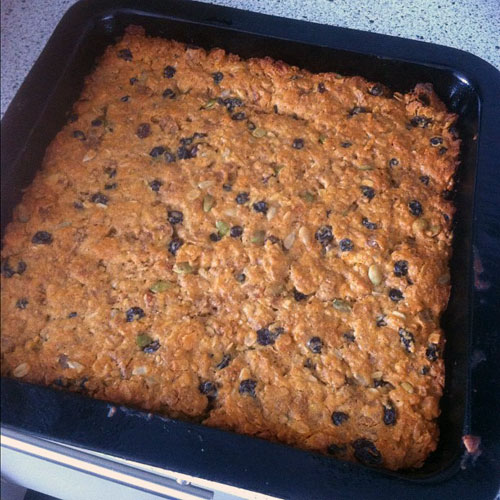
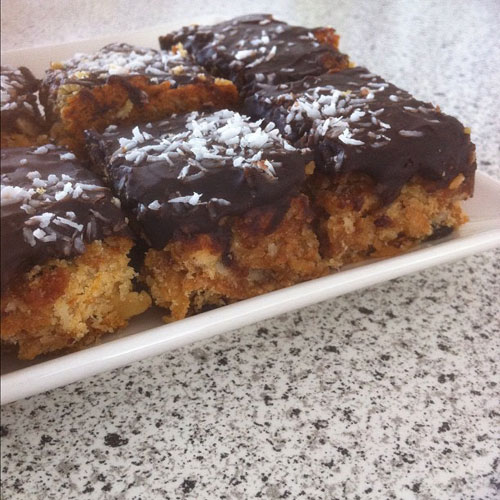
Muesli Slice…

….Or what I like to call throw it all together slice! I’m a big one for holding on to things a little while loooonger than most would consider okay. Home and lifestyle mags, clothing, books, recipes I might never use, leftover ingredients…yes, that one tablespoon of golden syrup sitting so snuggly in the neck of that plastic bottle or a few spoonfuls of that muesli I really like but doesn’t quite span far enough for a bowl at breakfast time!

Now I think this is possibly something that came from my Mum  (don’t get me wrong, she is certainly no hoarder!). I just love turning out all those leftover packets of different cereals, dried fruit, and a few seeds and nuts lying around and creating something new. By themselves, they barely make a meal but put them together and you’ve got a very scrumptious and fairly nutritious muesli slice. Just throw it all together and ta daaaa!

This is one of the easiest slice recipes I’ve come across too. I was able to throw it all together in a matter of minutes. Again with this one I just love the versatility in adding anything you like – apricots, dried fruit, nuts….even a little bit of chocolate..ooooh.

Muesli Slice

I got this basic recipe from Sanitarium but added my own bits and pieces I had sitting around in the cupboard. Different mueslis or cereals have different flavours, so experiment with a few to see which ones you like best.

  • 2 1/2 cups untoasted muesli (I combined two or three different cereals)
  • 1/2 cup shredded coconut
  • 1/2 cup dried strawberries
  • 1/2 cup currants
  • 1/4 cup flaked almonds
  • 1 1/4 cups self raising flour
  • 125g margarine
  • 1/4 cup brown sugar
  • 3/4 cup honey

Pre heat oven to 175°C and line a 17cm x 27cm slice tin with baking paper or just spray a few times. Place muesli, coconut, strawberries, currants, almonds and flour in a large bowl. Melt margarine, with sugar and honey in a small saucepan over medium heat. Add to muesli and mix well to combine. Place mixture into prepared tin and smooth the surface. Bake 25 minutes or until golden. Cool completely before cutting into slices.

I iced my slice once it has cooled but it really is quite okay as it is!

For the icing

  • 2 tablespoons of cocoa
  • 2 and a half cups of icing sugar
Combined the cocoa and icing sugar with a little water. I always get this ratio very wrong but it seemed to be quite spreadable with 2 tablespoons. If you like a darker, more chocolaty taste – add more cocoa. This slice recipe is already quite low in fat compared to some slices but if you wanted to make it even more healthier…you could of course replace the 125 grams of margarine with 250 grams of apple sauce or puree!

Lemon Sour Cream Cupcakes

It is Sunday afternoon and the All Blacks are just about to go head to head with Canada. I do watch the odd game of Rugby and I am 100% behind the All Blacks like the rest of New Zealand. With an abundant supply of homemade lemon curd in the fridge, it is the perfect time to make something delicious to eat while watching the game. Although this recipe is technically for a cake, they make perfect little cupcakes.

Lemon Sour Cream Cupcakes

  • 125 g butter, softened
  • 2 teaspoons grated lemon rind
  • 1 cup sugar
  • 3 eggs
  • 1 cup Edmonds plain baking flour
  • 1 teaspoon Edmonds baking powder
  • 1/2 cup sour cream
  • Icing sugar

Beat butter, lemon rind, sugar and eggs together until light and fluffy. Sift flour and baking powder together and fold sifted ingredients into egg mixture alternately with sour cream, mixing until smooth.

Pour mixture into a greased muffin tin.

Bake at 160°C for 45 minutes (usually less than this!) or until cupcakes spring back when lightly touched. Leave in tin for 5-10 minutes before turning out onto a cooling rack. Once the cupcakes have been baked and cooled, a hole is made in the centre of each cupcake and fill with a small spoon of lemon curd. Plug the hole with the cupcake lid to seal.

Lastly, I adore the combination of dark chocolate and lemon. It is delicious, but I find that it is rarely combined. Once the cupcakes have been iced, I decorate the top with a shard of dark chocolate. I hope you enjoy making this recipe as much as I do.