Cherry Ripe Mud Cake

I really enjoyed making this cake. Mainly, because it made a change from to my usual fall back recipe chocolate guinness cake.

Stupidly,  I left a bunch of my recipe books out recently, and my flatmate picked up my copy of Food We Love – a great little collection of favourite recipes from the Australian Women’s Weekly Test Kitchen. He came across an extremely mouth-watering image of a very dense chocolate cake, made with Cherry Ripe bars. Next came a request for a birthday cake. I didn’t really need any more convincing…

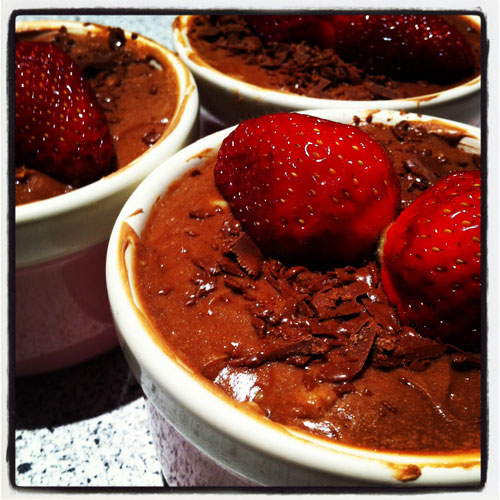
P.S. I really wish I had a much more exciting, colourful image to post with this recipe, but sadly that will have to wait until next time…..enjoy.

photo

Cherry Ripe Mud Cake

  • 250gm butter, chopped
  • 1 tbsp instant coffee
  • 400ml coconut cream
  • 200gm dark cooking chocolate
  • 1 cup caster sugar
  • 1 cup dark brown sugar
  • 3/4 cup (110gm) self raising flour
  • 1 cup (150gm) plain flour
  • 1/4 cup (25gm) dark cocoa
  • 2/3 cup fine coconut
  • 2 eggs, lightly beaten
  • 1 tsp vanilla extract
  • 5x (50gm) Cherry Ripe Bars, chopped coarsely

Preheat oven to 150°C, grease and line 1 x 23cm springform tin. Melt butter in large pot over medium heat. Add coffee, sugars and stir in chocolate until melted. Add coconut cream, stir till combined then set aside to cool. Whisk in sifted dry ingredients then coconut, vanilla and egg. Stir in ½ the Cherry Ripes (chop coarsely). Sprinkle rest of Cherry Ripes on top of cakes. Pour mixture into the tin and bake 40-50 min until top is set and is still a bit wobbly. Stand cake  for 10 minutes then remove sides and cool on wire rack.

This recipe is also my entry for Sweet New Zealand this month – hosted by Lucy from Lucy Eats. Check out all the fancy recipes on her blog at the end of the month.

posterf32576529a806eb339924191f5557132f28d6fa9

Chocolate Guinness Cake

photo

I’m pretty sure I’ve come across a winner here. The first time I sampled this gorgeous cake, which a friend made, it was absolutely to die for. That was it, I sourced the recipe and I don’t think I’ve made another chocolate cake recipe since.

I’m not a huge beer fan but it works perfectly with the chocolate, and the end result is super moist, chocolaty with an ever so slight taste of the Guinness.

For a slightly less elaborate presentation, you can definitely get away with a dusting of icing sugar. However, because I am pretty much in love with cream cheese, I definitely can’t pass up a decent spread of icing. And the combination of the creamy white topping on the dark black cake is visually stunning in my books.

This is hands-down the best chocolate cake ever. Moist, dark, chocolaty, and with a great silky texture so make sure you try it 🙂

Chocolate Guinness Cake

For the cake

  • 250 ml guinness
  • 250 grams butter
  • 75 grams cocoa powder
  • 400 grams caster sugar
  • 142 ml sour cream
  • 2 large eggs
  • 1 tbsp vanilla essence
  • 275 grams plain flour
  • 2 1/2 tsps baking soda

For the icing

  • 300 grams cream cheese
  • 150 grams icing sugar
  • 50 grams butter

Preheat the oven to 180 degrees, and butter and line a 23 cm springform tin.

Pour the Guinness into a large wide saucepan, add the butter – in spoons or slices – and heat until the butter’s melted, at which time you should whisk in the cocoa and sugar. Beat the sour cream with the eggs and vanilla and then pour into the brown, buttery, beery pan and finally whisk in the flour and the baking soda.

Pour the cake batter into the greased and lined tin and bake for 45 minutes to an hour. Leave to cool completely in the tin on a cooling rack, as it is quite a damp cake.

When the cake’s cold, sit it on a flat platter or cake stand and get on with the icing. Lightly whip the cream cheese with the butter until smooth, sieve over the icing sugar and then beat them all together until it makes a spreadable consistency. Spread the icing on top of the cake.

photo

Mini Baked Chocolate Cheesecakes

Well, Happy New Year! I hope you’ve all had yourself a nice indulgent, and refreshing break. I admit I had intended to blog about this a little sooner but, you know…holidays happened. Hasn’t that sun been great?! Well, recently anyway 🙂

I found this recipe, by Donna Hay, in the New Zealand Herald last year.  Despite regularly browsing the lifestyle (namely food) pages of our online newspapers, I was instantly drawn to the rest of her equally indulgent and mouth-watering recipes. You can check them out here

The dessert itself is not heavy at all, and melted in my mouth with a slight moussy texture. I found the sliced fruit (berries, mainly) helped complete the richness and also made it perfect for someone who doesn’t have quite a sweet tooth.

I enjoyed the smaller individual-sized portions which are great if you are making them for a small group of people. There wasn’t any leftovers laying around in the fridge to taunt me in the days following!

So, welcome back to After Taste for 2013 – you can expect all sorts of exciting and tasty recipes to surface in the coming months and in the year ahead.

See you all again soon!

Mini Baked Chocolate Cheesecakes
Serves 4
photo

  • 100 grams chocolate biscuits
  • 30 grams butter, melted
  • 2 tbsp ground almonds
  • 400 grams cream cheese
  • 1/2 cup caster sugar
  • 2 eggs
  • 150 grams milk chocolate, melted
  • Small amount of extra chocolate, for flaking on top
  • Berries, to serve

Preheat oven to 150 degrees. Place the biscuits, butter and ground almonds in the bowl of a small food processor and process until roughly chopped. Spoon the mixture into the base of 4 x 1 cup-capacity ovenproof dishes and press down using the back of a spoon.

Place the cream cheese and sugar in the bowl of an electric mixer and beat until light and creamy. Add the eggs, one at a time, and beat until smooth and thick. Fold through the chocolate and spoon over the biscuit bases.

Place the dishes on a baking tray and bake for 20-25 minutes or until firm to touch. Allow to cool completely at room temperature before placing in the fridge for 2 hours.

Dust with roughly chopped chocolate flakes and top with berries of your choice. Enjoy.

photo

This recipe is my entry in Sweet New Zealand for February 2013! Check out all the great recipes at Greedybread at the end of the month!

sweetnz


Raspberry and White Chocolate Fudge

My favourite brand of chocolate would have to be Whittaker’s, especially the delightful and fairly newly created White Raspberry chocolate block.

This delicious new flavour was an initiative of Samuel Marsden Collegiate School here in Wellington. As part of the Young Enterprise Scheme, a group girls put their thinking caps together and came up with this pink block in support of Breast Cancer.

Their pitch was so successful, the chocolate-maker adopted their idea and included a raspberry white chocolate in their line.

For each block of the chocolate sold, 20 cents will go to the Breast Cancer
Foundation. What a great reason to go out and get some and make this fudge in time for Christmas! I really think the raspberries beautifully complement the scrummy white chocolate. Enjoy!

Raspberry and White Chocolate Fudge
Makes 40 pieces

  • 2 x 400g cans sweetened condensed milk
  • 2 cups firmly packed soft brown sugar
  • 250 g butter
  • 100 ml liquid glucose syrup (try your local pharmacy)
  • 3 tbsp golden syrup
  • 2 x 250 grams Whittaker’s White Raspberry chocolate, chopped
  • 1 teaspoon vanilla

Spray and line a slice tin or container with non stick baking paper.

Place all ingredients, except the white chocolate and vanilla, in a large heavy based saucepan and stir over medium heat until the butter melts and the sugar dissolves.

Bring to the boil and boil gently until it becomes very thick and changes colour to a dark caramel brown paper shade – about 6 minutes, to the soft ball stage, 116 degrees on a sugar thermometer.

Stir often to prevent catching on the bottom. Remove from heat and stand until the bubbles subside. Stir in the white chocolate and vanilla until melted and smooth.

Pour into the prepared tin and smooth the surface. Cool to room temperature (about 3 hours ) then refrigerate until firm.Sprinkle over some leftover white chocolate once cooled. Cut into squares. Store in an airtight container in the fridge for up to 6 weeks – if it really does last that long.

Double Chocolate Cream Cheese Filled Muffins

What can I say? These muffins are epic. This is your ideal recipe to whip up on a cold, blustery day like it is in Wellington at the moment, infact all over New Zealand I believe!

I like them best straight out of the oven when the piping hot cream cheese just oozes out from between the chocolatety goodness. Incredible.

Guess you’ll just have to try the recipe to know what I’m talkin’ ’bout 🙂

Double Chocolate Cream Cheese Filled Muffins
Makes 12

  • 1/2 cup canola oil
  • 3/4 cup sugar
  • 2 large eggs
  • 1 tsp vanilla essence
  • 1/2 cup sour cream
  • 2 tsp milk
  • 1 cup flour
  • 1/4 cup cocoa
  • 1 tsp baking powder
  • 1/4 tsp baking soda
  • 1/4 tsp salt
  • 1/2 cup chocolate chips

Filling:

  • 100 grams cream cheese, softened (I used light Philadelphia cream cheese)
  • 2 tbsp sugar
  • 1 tbsp flour

Preheat oven to 180 degrees. Line a muffin tin with paper liners or spray well with non stick cooking spray. Set aside.

In large bowl, beat the oil, sugar, eggs, vanilla, sour cream and milk until well combined and light in color, for 3 minutes or so. Fold in remaining ingredients until just combined.

In small bowl, mix cream cheese, sugar and flour together until smooth. Set aside.

Scoop 1 large spoonful of muffin batter into prepared muffin tins to be 1/3 way full. Drop small spoonfuls of cream cheese mixture into middle of muffin batter (should be about 1 1/2-2 teaspoons per muffin). Scoop another large spoonful of muffin batter and pour overtop cream cheese mixture. Muffin tins should be filled 2/3-3/4 way full.

Bake 20-25 minutes. Remove from oven and cool 10 minutes before removing from tins. Once cooled, store in air tight containers, ideally in the fridge.

They also freeze particularly well 🙂 Enjoy.

Chocolate Yoghurt Cake

You can never have too much cake.

You can certainly never have too many recipes for cake.

This recipe is fairly easy but I thought I would share it with you anyway! It might look just like a very basic chocolate cake recipe, but it is also, by far, one of the best chocolate cakes I have ever tasted. That’s the truth.

Although I prefer other types of cakes, particularly lemon or carrot, there is something about sinking your teeth into a delicious slice of moist chocolate cake. Just a short post tonight for a very quick and easy recipe! Enjoy.

Chocolate Yoghurt Cake
Serves 16

  • 2 cups flour
  • 1/2 cup cocoa
  • 2 tsp baking powder
  • 2 tsp baking soda
  • 2 cups caster sugar
  • 1 cup cold coffee
  • 1 cup plain unsweetened yoghurt
  • 1 tsp vanilla essence

Preheat the oven to 180 degrees. Mix dry ingredients and make a well in the centre. Add a cup of cold coffee, yoghurt and vanilla and mix until well combined. Place mixture in a greased tin and bake at 180 degrees for approximately 1 hour. The cake is cooked when a skewer comes out clean but moist and cake is springy to touch.

Ice, once cooled, with chocolate icing or serve hot from the oven with ice cream for an indulgent dessert.

Whittaker’s White Chocolate Oreo Truffles

Okay, correct me if I’m wrong but is there *anything* better than oreo biscuits and cream cheese? ……………….hello?

Er, no. Didn’t think so.

The following recipe is the stuff that dreams are made of. Oreo cookie crumbs blended with cream cheese and covered with a white chocolate shell. They really are the very best-tasting truffles in the world

The first time I ever tried one of these; my mouth was watering for more.  I can assure you they are one of the yummiest things ever and so simple to make because there is absolutely no baking involved. Better yet, you only need three ingredients.

Happy truffle making!

Whittaker’s White Chocolate Oreo Truffles
Makes approximately 15 truffles

  • 250 grams cream cheese
  • 2 packets Oreo cookies
  • 1 block Whittaker’s White Chocolate
  • Optional – Dark Sante bar to drizzle

Crush the cookies to fine crumbs in food processor and place in medium bowl. If you don’t own a food processor, you can just as easily crush them in a plastic bag. Add the cream cheese and mix until well blended. Roll truffle mixture into approximately 15 balls and place on a baking tray lined with paper. Refrigerate until firm, for about 1 hour.

Remove the balls from the fridge. Break up the block of white chocolate and melt in the microwave until smooth. Dip balls in chocolate and place on  a clean sheet of baking paper. If you like, you can  drizzle with a bit of melted dark chocolate to decorate.

Return truffles to the refrigerator and leave until firm and chocolate has set. Store the truffles, covered, until needed. Believe me they won’t last long – you have been warned.

This is also my entry for Sweet New Zealand. May is hosted by Jemma at Time for a Little Something. Head along to her page and check out all the entries at the end of the month.

Golden Orange, Date and Chocolate Cupcakes

It is not every day that I have fruit leftover which is slightly spoiled and in need of some attention. I usually can’t get enough of the stuff so it barely makes its way into the fruit bowl before it is completely annihilated. Yes, I just love fresh fruit.

You’d think because of this intro that I was talking about some fabulous fruit haul, like a bumper crop of feijoas or perhaps some juicy plums that had seen better days. Nope, not this time. Just a couple of sad-looking oranges.

My love of fruit of course makes me entirely jealous of people with free-standing houses and the ability to plant fruit trees galore that reproduce and get bigger, and better…year after year. Little ol’ me just lives in an apartment complex. The closest I get to a large supply of fruit is basically relying on the generosity of others! Workmates, mainly.

Anyway, least I know what my priorities are for later in life: 1. Free-standing house, 2. A big garden, 3. LOTS of fruit trees.

Back to the recipe.

There are so many great flavour combinations; I wish I kept a bit of a list. Every now and then I will read some thread where someone goes off on a riff of great combos. If I don’t write it down when I read it, I lose the info.

Orange and chocolate make a pretty delicious combination. Just like dark chocolate and lemon, white chocolate and raspberry, pear and caramel. This is originally a cake recipe which I’ve adapted slightly for a 12-hole muffin tray. The dates only add to the flavour, so if you don’t like them I suggest throwing them into the food processor with the orange and munching them up until they are really small. I really love dates so don’t like them too tiny.

The cake recipe suggests that you ice once baked (and you can do!) but I thought these little rays of sunshine tasted just perfect by themselves. The chocolate square on top adds that extra bit of sweetness and really compliments the orange, skin and all 🙂

Enjoy!

Golden Orange, Date and Chocolate Cupcakes
Makes 12

  • 1 cup of sugar
  • 1/2 a cup of butter
  • 2 eggs
  • 1 orange
  • 1 cup of chopped dates
  • 1 teaspoon of vanilla
  • pinch of salt
  • 2 cups of flour
  • 1/2 a teaspoon of baking soda, dissolved in 3/4 cup of water
  • Dark, milk, or white chocolate, 12 squares

Cream together the sugar and butter in a large bowl. Add the eggs one at a time, mixing between additions. Munch up a whole orange in blender (skin and all!) and add to the creamed mixture.

Add the chopped dates (which can be done by popping them in the blender at the same time as the orange), vanilla and salt to the mixture. Stir in the flour and baking soda ( dissolved in the water).

Pour the batter into a lined and greased 12-hole muffin tray and smooth out evenly. Poke a piece of chocolate into the batter of each cupcake. You can smooth the batter over the top of the chocolate if you like but I left mine on top – nice bit of decoration. Bake at 160 degrees for 25 minutes or until cooked (definitely better on the slightly undercooked side!)

This is my entry for Sweet New Zealand hosted by Bake Club this month. Get along and check out some of the entries at the end of the month!


Chocolate Peppermint Cupcakes

Just a quick one today! This chocolate mint cupcake recipe makes the ultimate cupcake for chocolate and mint lovers, like myself. If mint isn’t your thing then just ice with regular chocolate butter icing.

Yay! Today is the last day of work before we embark upon the 4-day Easter weekend. Gosh, isn’t the year is zipping by very quickly? It is now only 44 days until my big trip to Europe and the States – pretty exciting but so much to do before departure!

Have an egg-cellent long weekend everybody!

Chocolate Peppermint Cupcakes
Makes 12

For the cupcakes:

  • 125 grams of butter
  • 1 cup of white sugar
  • 2 tablespoons of golden syrup
  • 1 egg
  • 1 cup of trim milk
  • 2 cups of plain flour
  • 1 teaspoons of baking powder
  • 2 tablespoons of cocoa
  • 1 teaspoon of cinnamon
  • 1/2 a teaspoon of salt
  • 1/2 teapsoon of vanilla essence
  • 1 teaspoon of baking soda
  • 1/4 a cup of trim milk

For the icing:

  • 2 tbsp butter
  • 2 cups icing sugar
  • 2 tbsps cocoa
  • 2 tbsps hot water
  • few drops of green food colouring
  • few drops of peppermint essence
Cream together the butter and the sugar. Add the egg and beat well until combined. Beat in the 1 cup of milk. Sift in the dry ingredients and fold in. Add vanilla. Dissolve the baking soda into the milk and add to the cake batter. Mix extremely well. Divide the mixture up between a 12-hole muffin pan.
Bake for approximately 20 minutes at about 180 degrees. Set aside until the cupcakes have completely cooled.
For the icing, blend together about 2 tbsp of butter with 2 cups of icing sugar. Add a small amount of cocoa and a few drops of green food colouring. If you want a brighter shade of green that isn’t chocolate peppermint flavoured, omit the cocoa.


Kiwi Chocolate Afghan Biscuits

Home-baked chocolate afghans are nothing new, or flash for that matter. However, they are particularly yummy and seem to go perfectly with a hot drink on a cold day (like today, if you’re in Wellington!). To me they really belong in that “comfort food” category, right next to the ANZAC biscuit…

Afghan cookies are chunky, crunchy and slightly crumbly. And just like the kiwi ANZAC biscuit, Afghans require only a handful of ingredients so they are very easy to make.

The biscuits on their own are not very sweet so the icing is definitely needed and unless you have some extreme allergy to nuts..don’t forget to decorate with a wee walnut. Alternatively you could sprinkle with coconut. Delicious.

Kiwi Chocolate Afghan Biscuits

  • 200 grams butter, softened
  • 1/2 cup sugar
  • 1 tsp vanilla essence
  • 1 1/4 cup plain flour
  • 1/4 cup cocoa
  • 1 1/2 cornflakes, crushed
  • 2 cups icing sugar
  • 2 tbsps cocoa
  • 1-2 Tbsp boiling water

Preheat oven to 180°C. Grease or line a baking tray with baking paper.

In a large bowl beat butter, sugar and vanilla until light and fluffy. Sift in flour and cocoa, stir thoroughly with the butter mixture until combined before stirring in the cornflakes.

Place heaped teaspoonfuls onto baking tray, squeeze mixture together gently if necessary then press lightly with a fork. Bake for 15-20 minutes. Cool on a wire rack before icing.

Mix the icing sugar, butter and 1 Tbsp boiling water at a time until combined, adding more hot water if necessary until icing is a spreadable consistency. Ice biscuits and top with half a walnut.